
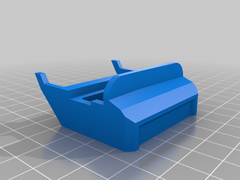
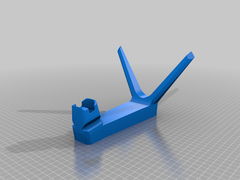
made the grip’s back smooth and rounded off the top mount hole
hint: if the top does not quite slip onto your airbrush just take a flush cutter or something else to split the layers so you’re left with two half-circles
made the grip’s back smooth and rounded off the top mount hole
hint: if the top does not quite slip onto your airbrush just take a flush cutter or something else to split the layers so you’re left with two half-circles
Problem:
The shape and thickness of my new monitor does not really allow positioning the BenQ Screenbar on top of it. Furthermore the slightly curved display isn’t an ideal mix with the non-curved LED bar.
So I’ve created this adapter plate to place between monitor and screenbar. Enjoy. 🙂
Thanks to Platzhalter for a starting point for this model remix.
Just modified it slightly, added 4 slits so it can stretch a little better when there’s just half a mm missing, also added 4 spacers (or however those would be called) to lower the friction when you want to actually remove it again.
Printed in PETG (flexes better than PLA) and it’s fitting absolutely great, spot on!
To the original creator: great idea!
Due to Rewbin asking over at my Fanatec QR Wheel Stand in the comments … I quickly edited that one to work for the new 2023 QR2 quick release mechanism (probably, please confirm). Tried to maintain the original dimensions/positions to make it still fit in one piece on the build plate.
So please note: this is untested as I do not own a QR2 wheel and base.
As this is a functional part and the wheel can be heavy, take this into account when choosing your filament, number of perimeters and infill percentage.
Mine from almost 4 years ago (obviously QR1, not QR2) is still fine using PLA with 3 perimeters and 20% infill though, but your mileage may vary.
Thanks very much to Thrilex for providing a model of the mount stub.
Please note: this is the QR2 version (bars)!
Get the QR1 version here …
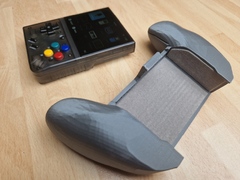
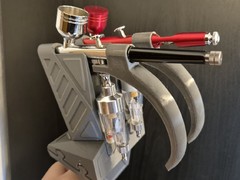
This controller grip is for the Miyoo Mini Plus and should be used with self-adhesive felt.
Btw: the grooves/slits are there so the seams are not on the surface of the print.
Please use the .stl provided or if you like the .gcode.
I have added the open .3mf files but due to an accident v4 already is the final, substracted form, so please bear in mind that v3 with separate elements is a little older.
This took several hours and about 5 prototypes to make yet it isn’t perfect … hope you’ll like it anyways.
Items from Amazon DE
*self-adhesive velvet flocking sheets:
https://amzn.to/3YimvTv
*The used link(s) is/are so-called affiliate link(s). When you buy a product using this link, I will receive a small provision. The price itself does not change. Thanks so much for your support 🙂
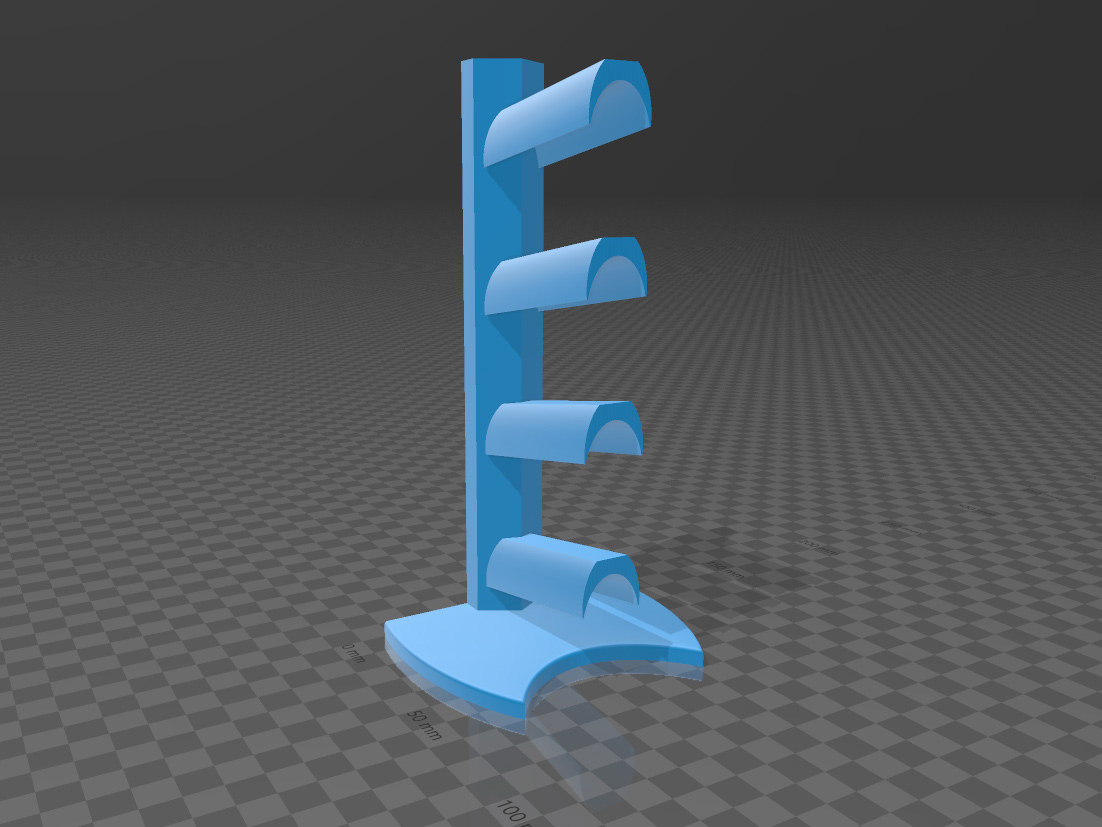
I have angled the holders slightly, moved them a little closer (about 5mm) and changed the main back to be polygonal so I don’t have to deal with the print quality of rounded surfaces when printing in this orientation.
Thanks for the original model – nothing wrong with that by the way, just personal preference or „may be’s“ 😀
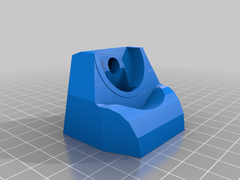
Since the new charging puck not only features USB-C instead of USB A plug, 10W instead of 5W (if connected to a PD capable USB-C charger) but also a smaller footprint / diameter, I had the choice to stuff some sort of thick glue tape inbetween or fill it up otherwise or to design a new stand (or base it off an existing one – which I did: thanks Stefan042 and JSC, https://cults3d.com/de/modell-3d/gadget/samsung-galaxy-watch4-charging-dock) …
Well, introduction aside, this is new:
The „edgy“ design is more polygonal, basically I tried to create a smaller print but also to prevent my Cura 5.1 slicer to place the z seam in the front due to the rounded back.
In hindsight I should have tried to modify the Fusion file, instead I cobbled it up in 3D builder. Meh 😉
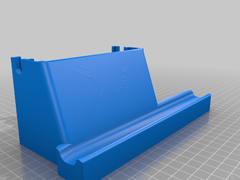
Due to buildplate dimensions and not really needing the whole width (and height) of the original I have opted to cut off portions of the dock.
However I’ve left just enough of the slant/curves in so the Steam Deck more or less registers into the groove, kind of.
Just used Microsoft 3D Builder to substract/add stuff which took quite some time but as always I’ve included the 3mf file if you want to change something. It is at a later stage where the original dock was already cut to size, but you could just add the original in and just don’t cut off left/right/bottom.
Since I’ve won (yay!) the Anker 341 USB-C Hub (7-in-1, model A8346) I’ve added a slot on the back to slide that into. You have a cable channel for its main USB-C connection on the left and right and you may want to rotate it so you can have the USB-A ports top and the HDMI/USB-C PD port on the bottom … or vice versa. Do as you like or your cable management needs.
I am using a magnetic 40 Gbps USB-C 90 degree adapter by the way, which works great! Just keep in mind to not block the exhaust port on the top of your Steam Deck by routing the cable over the power button on the right, not over the vent on its left.
Here are the products I am using in case you may want to take a look or even buy them:
Items from Amazon DE
*Anker 341 USB-C Hub (7-in-1, model A8346):
https://www.amazon.de/?&linkCode=sl2&tag=smashdde-21&linkId=130bd56df0094b92f89443ed97311fd8&language=de_DE&ref_=as_li_ss_tl
*USB Type C Magnetic Adapter, USB4.0 40Gbps Data Transfer, 100W Quick Charge and 4K@60 Hz Video, but eg. Aliexpress could be a lot cheaper (got the connector in straight and angled for about 3.50 EUR each, the plugs itself can be bought seperately for even less):
https://www.amazon.de/?&linkCode=sl2&tag=smashdde-21&linkId=130bd56df0094b92f89443ed97311fd8&language=de_DE&ref_=as_li_ss_tl
*The used link(s) is/are so-called affiliate link(s). When you buy a product using this link, I will receive a small provision. The price itself does not change. Thanks so much for your support 🙂
Side note: since Steam Deck defaults to highest resolution available you might get 4k@30 at the moment in game mode. In desktop mode you can get it to output 1080p@120 (when your display/TV supports it) so I really hope Valve gives an option to force a specific resolution. Which should happen since they plan to release their own dock and probably run into the same issues there.
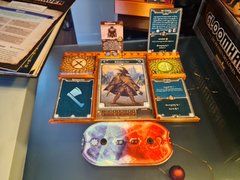
I am fairly new to JOTL, but I liked UnclePats player dashboard so much (lightweight, easily fits into the games box (even two of them like in my case), easily to understand but still versatile layout, …) so much that I tried to improve – or should I say adapt it to my needs – a little more.
Please note: You’ll need glue to join the two parts of the dashboard.
You may combine the left or right part of the dashboard with the card spacer STL in Microsoft 3D Builder or any other model editing software before printing or just glue them in place after.
And just like after every print there are things to improve but not game-breaking neither. e.g. I didn’t realize the lowest point of the card slopes is so thin.
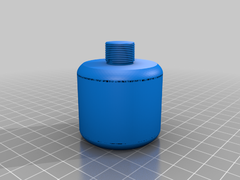
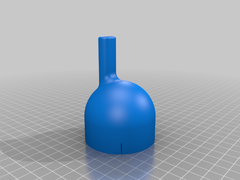
I have bought a desktop microphone mount (or stand) with an universal shock mount (plastic bracket). The diameter of the HyperX Solocast microphone is to wide to fit the inner ring of the shock mount so I have designed a „dummy“ microphone body with a 5/8 inch screw on top (have no fitting screw/bolt around neither).
The provided 3mf file provides non-merged objects so you may adjust it to your needs.