
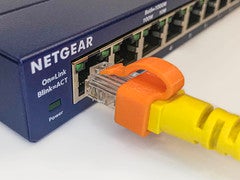
This clip was design to fix/repair/secure the broken or loose tab of a RJ45 Ethernet connector and avoid crimping. Designed to prevent from moving, wiggling, falling from the connector and easy to install.
UPDATE v.4.9 | 28/01/2021
Added the 3 following files which have slightly wider body (0.25mm) than 4.7 version and small upgrade on the tip.
1. „4.9.nf.supported“ (extension) comes „with supports“ for the ones are not very familiar with. But I still prefer S3D’s supports.
2. „4.9.nf“ (extension) with „no fillet“, to make it easier printing with supports.
3. „4.9“ (extension) with fillet, for „smooth edges“. On FDM printers isn’t that much noticeable.
UPDATE v.4.7 | 01/01/2021
Added another version with „no fillet“ („.nf“ extension), actually it has sharp edges to make it easier printing with supports.
Printing
Suggested printing orientation is the one as the files are stored, why?
Printing the tab from the base to the tip in X-Y axis makes it stronger and more flexible since its printed in one continued string.
If you change the orientation with the tip on top then tab’s base will start from the bottom and builds up while the Z axis is sticking the rest of it till the tip. With this orientation the tab has more possibilities to brake since Z layers don’t bond the same as the method I suggested.
*If you have another solution let me know.
Supports
Supports needed and you need to be experienced with good slicer settings. Also attention needed when removing them from the actual print.
Or you can print the file with „4.8.nf.supported“ (extension) which comes with supports. But I still prefer S3D’s supports.
Installation note:
1.Before install the „printed clip“ check the left overs of the broken tab. If it is too long the tip of the „printed clip“ might not click underneath the left-over. So, I suggest to leave a length of the broken tab about „0,5-1,0mm“. If the broken tad left-over is to small or cuted flash then the printed one might not click and hopefully that would work well, haven’t tested that scenario.
2.Follow the sketches to install the „printed clip“, also while sliding in if you find it a bit hard some wiggling might help.
*You may call it the „ScorpioNet“ or „Devil’s Network Tail“!
- Designed in Inventor
If you enjoy and want to support my work you can donate me on the link below,
Thank you!