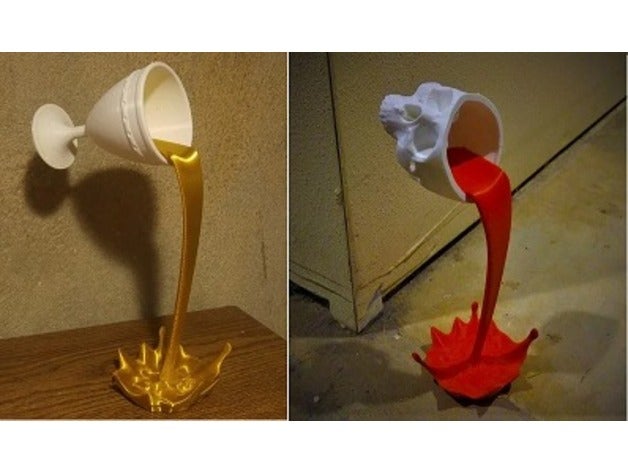
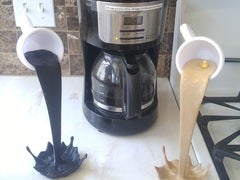
This is a (still easier to print and assemble) improvement on the previous https://www.thingiverse.com/thing:3617536 . This and that previous submission are both remixes of HappyMoon’s „Floating Cup Sculpture“.
[I’ve edited the files and summary a bit more (July 7, 2019), as I found that printing the ’stream‘ part of the sculpture can be difficult on some printers when printed high off the bed. And that actually, printing it sideways on the bed works and looks much better.
July 19: rotated the „preferred“ version of stream so that it can fit also on a 200mmx200mm bed]
I recently was printing one for my daughter, but managed to attach the „stream“ backwards to the „splash“, which made it lean the wrong way so it wouldn’t stay standing up. So, this one uses a trapezoid-shaped pin (rather than 2 square pins), which both holds the parts together better and also prevents them being attached backwards. Other improvements are that the seam between the stream and the splash has been moved lower where it is even less likely to be noticed; and mass has been removed from the part of the „stream“ that sits inside the cup to improve stability when the sculpture is standing up.
Some tips I’ve figured out:
1) Print the „stream“ part with low infill (10% or even 5%) to minimize the weight of the thick off-center part that is inside the „cup“. Be careful removing this part from the bed, since with low infill it won’t be as strong — don’t try to pry it off by yanking on the long part of the stream! The „stream“ part will need supports, no matter which orientation you choose.
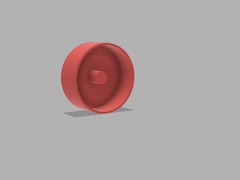
2) Print the „cup“ part at low infill (5%) also and low number of perimeters for least weight. I used PLA and PETG for the cup. You could instead use a styrofoam or paper cup for low weight or for a different look. Test your glue first if you use those, though, to make sure it will stick to them.
3) Print the „splash“ part and the pin with high infill (85% or so, but not quite 100%) to maximize its weight for stability when standing.
4) Only needed if printing the „stream“ upright: then use a smaller nozzle when printing, or at least with somewhat small layer heights (about 0.24mm), so the lines don’t show too much on the near-horizontal areas. Some lines may actually add to the liquid appearance, but lines that are too coarse won’t look right.
5) All parts should be printed oriented as the STLs are provided.
There are now three STL files provided for the „stream“ part, they are exactly the same, but in different orientations for printing. The one marked „preferred“ is for printing on its side, and has turned out to be the most trouble-free to print. In fact, that one is pretty hard to mess up and has a great smooth surface, so it is „preferred“. It uses a little more support material than the „inside down“ version (the one where the large puddle that sits inside the cup lies right on the bed), but gives a very easy to get, smooth surface and is very unlikely to have bed adhesion issues. The „inside down“ version uses the least support material, usually prints well, but shows some texture where the support breaks off in the more horizontal puddle area. The „narrow down“ (don’t use that one!) version has a good surface, but uses the most support material and has proven to be more difficult for some people to print since moving beds and gravity can cause it to topple before support material has been completed. That file is left here for continuity of the file set.
6) It would seem like a good idea to use „wood filled“ filament for the coffee/hot chocolate liquid parts — but don’t! The wood filaments are very brittle and you’ll find the thin upper fluid drips of the „splash“ will break off very easily. Black or brown PLA would be a better choice, or other colors for other beverages.
7) I’ve used super-glue (cyanoacrylate) gel or clear 2-part epoxy glue (best choice) to attach the stream, pin, and splash parts. Test-fit the pieces first (!), file mating surfaces if necessary. You may need to trim the edges of the „pin“ if there is any ‚elephant’s foot‘ on the print — choose the best fitting pin from the set, and use a razor knife, file or sandpaper to trim any squished edges. THEN, after adding glue and assembling, stand it up on a table near a wall with the part of the stream that will go into the cup pushed slightly against the wall to make it lean a little more toward over the „splash“ (see photo). Most important is to prevent it from leaning the other way as gravity would tend to take it! Leave it set against the wall like that until the glue cures. As with any time you use epoxy or superglue, avoid moving the glued joint while it cures.
8) I’ve used clear epoxy or super-glue gel for attaching cup to the stream, epoxy seems the best. Hot melt glue might work as well, but be careful as it might also warp the walls of parts. Put glue only onto the surfaces of the stream that actually contact the inside of the cup to keep weight low there.
9) The best way I’ve found to hold the cup and stream together while glue sets is to use a small ratcheting bar clamp or C clamp — keep the stream down against the cup all the way to its back.
But almost as good is to just lie the cup on its side at the edge of a table and then put the stream&splash inside of it after glue applied, with the splash part hanging under the table. Let gravity do the work.
It might be a good idea to stack up some cards under the back of the cup (not shown in the photo) so that the cup stays tipping forward during curing to help balance.
10) (yes, there’s a duck swimming in the ‚with cream‘ coffee cup. My daughter likes ducks, what can I say?) 🙂
There is a file of trapezoidal pins scaled to a range of sizes, used to attach the „splash“ to the „stream“ and keep them aligned. Choose the largest one that fits into the sockets in the „stream“ and „splash“ parts. Trimming their edges with a knife or clipper, or sanding them down may be required.
similar pouring cups using the same type construction:
Floating goblet: https://www.thingiverse.com/thing:3761400
Floating skull: https://www.thingiverse.com/thing:3772304